
I apparently never actually published this back 2 months ago. Probably a good thing though, as I accidentally deleted my photo files to which all my blogs photos are linked. I will have to go back in at some point and reinsert every photo from every blog. Sure. Anyway, at least just getting this one updated with the correct pictures is finished. Keep reading to see what I thought I'd published.
Well, once again it's been forever since I posted. But I have good reasons! Since my last post I was offered and accepted a new job. I quit my other two jobs, took a week to visit my mother and a week to just be, then jumped into the new job. I am now the Tech Coordinator/Teacher at St. Matthew Catholic Grade School. I absolutely love it, but it has been a challenge. My first duty was to order new laptops for the computer lab to replace the ancient eMacs currently in use. Then once they came in, I had to get them set up. Not the easiest thing in the world since I'm not a Mac user nor a server tech. It took two full weeks of 12-14 hour days to get it done, but I did finally finish. Tomorrow will be the first day with students in. I'm anxious to see how it goes.
While all this was going on, two of my children also moved. Both here in town still, which is nice, but it was busy nonetheless. I also helped a good friend pack her house to move away, and spent a weekend helping another go through all her craft room stuff to de-clutter and reorganize.
And I still managed to finish my craft room (aka my eldest's former bedroom. Called my crap room by my DH)). I've never done so much painting in one room. It was about 8 coats-3 or 4 of primer and 4 of color. I though I'd never finish! But finish I did. And I have been enjoying it immensely ever since. Here are the befores....

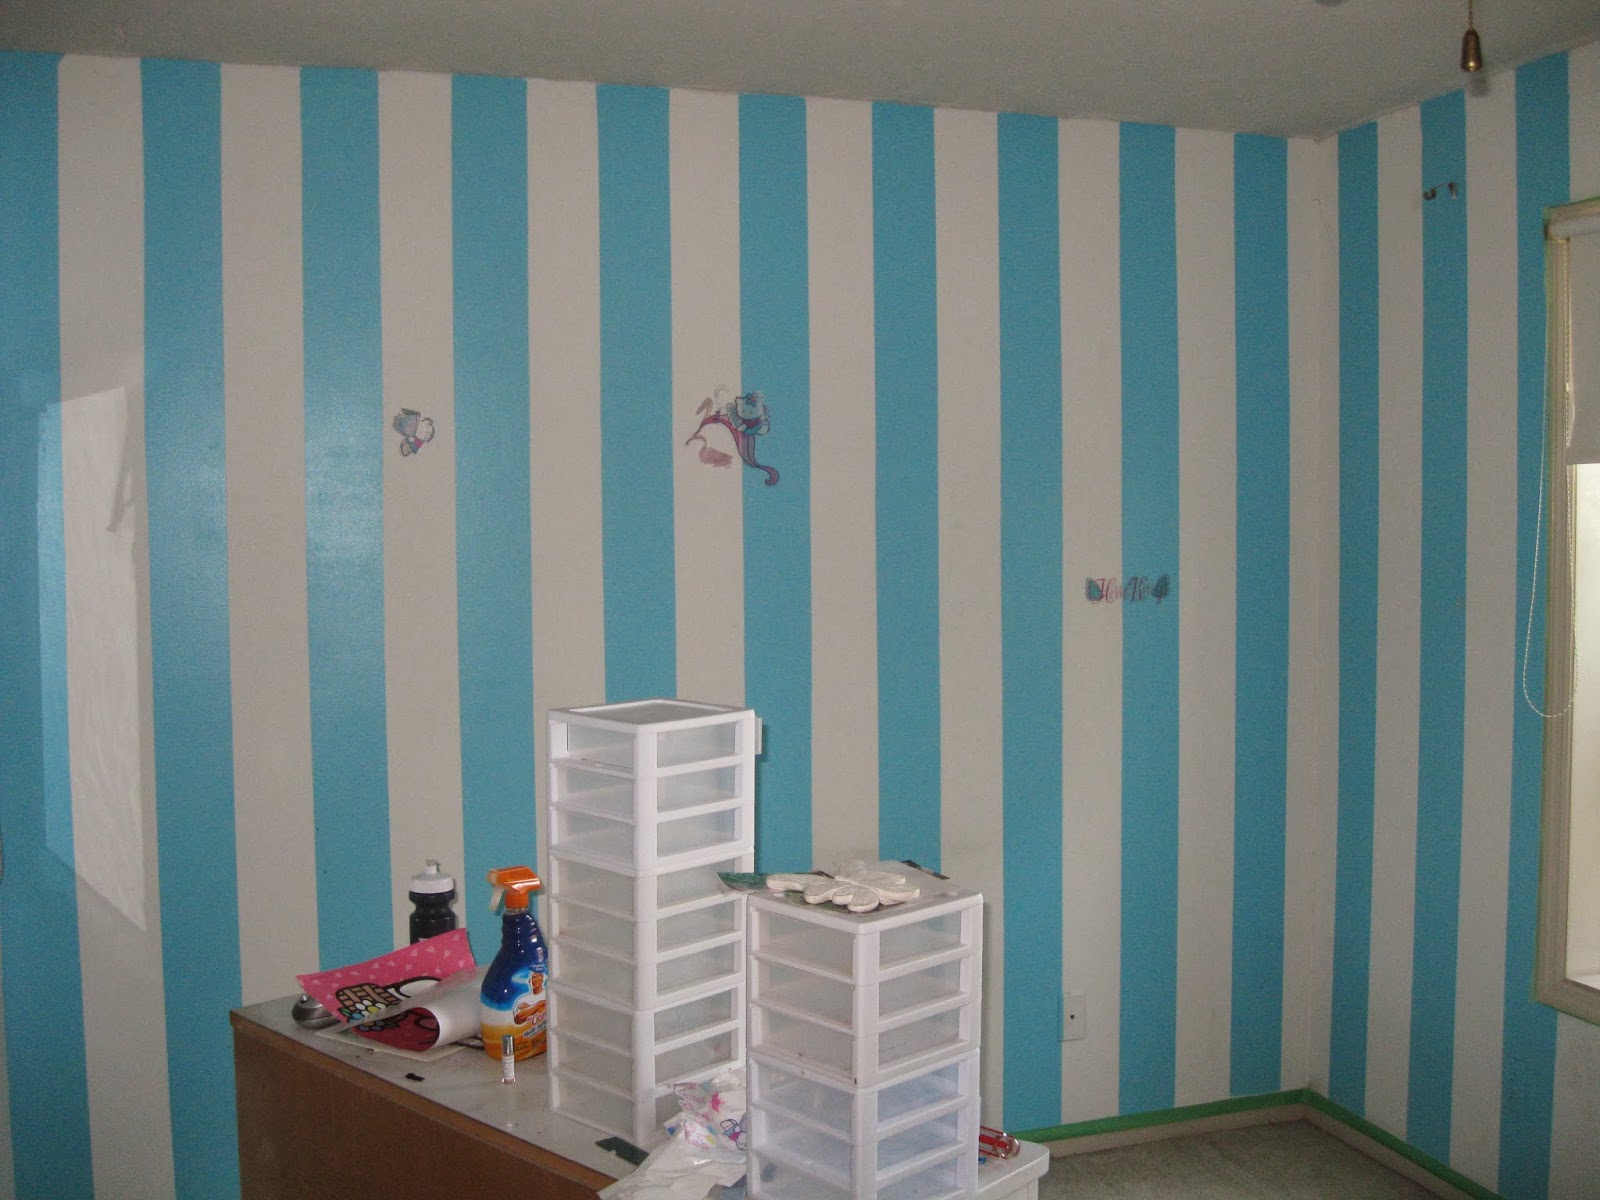


At some point I let my daughter convince me that striped walls were a good idea. And they were. Until I wanted to paint over them. As mentioned before--7-8 coats later....
And now the afters....
 The love seat is one my daughter and I rescued from a dumpster a number of years ago. I decided to just recover it to make it match everything else. My original plan was to use a green and yellow chintz, but I couldn't find coordinating fabrics.
 Then I saw this, with several other coordinating options and just had to have it! My cat loves to sleep here while I'm working. The pillow is made from left overs fromn the curtains. The mirror is from my dresser set that I mention a little further down.
 The storage system is a combination of new and old. The drawers, thin shelves, and desktops are new. The cubbies I've had and used for about 15 years or so. I turned some of them on their sides instead of using them upright. Of course, because they aren't meant to be used that way, it means that there was bare pressboard showing. So, more paint! The shelves above came already painted, thankfully. They hold all my single stamps. The ribbon organizer is something I ordered several years ago but never put up. Of course, it was black, so....yes, more paint! It wasn't quite designed to use the way I have it setup, but I rigged it to work for me.
 The green frame was originally supposed to be a leg of a fold down-table I was planning. However,
 after having it almost all finished, I realized it wouldn't be sturdy enough for stamping, so I had to come up with a different idea. I ended up buying an old table and repainting the legs and frame (more paint!). There's a better picture below. The dresser was the one I grew up using, then my nieces used, then my daughters used. It has held up awfully well for almost 50 years now. Can't buy them like that today.


Here is another view taken at night so you can see the curtains a little better. The curtains are made from the third coordinating fabric, while the tie-backs match the t able and the valances match the love seat. I bet you'd never guess I like bright colors, would you?
Now for some detail closeups....


I used left over fabric and modge podge to decorate my switch plate and outlet covers.
This is a marker holder I made from scrap wood and fluorescent light grid. I originally saw idea on a blog to use the ceiling tile light grid in a box. I didn't want a box, so I adapted the idea for my space. I didn't put a back on it because I wanted to be able to see the pegboard through the back. I probably would tweak it a bit if I ever made it again, but it works. It is big enough to hold about 300 markers! And the best part is, there is enough of the grid to make several more, and it only cost about $8. Of course, I had to PAINT the scrap wood!

 I saw this idea, kind of, on Pinterest. But where the original was one color in each drawer to make the container itself look like a paint chip card, I decided to make each drawer a paint chip. It designates the shades of card stock inside.

So there you have it. A tour of my new craft room. I love being in there. I used to craft in the basement, where there was no window and no way to watch tv, get cell phone reception, etc. Now I have a wonderfully bright and cheerful room with a tv. I can use my laptop or iPad for reference while I'm crafting. I have a place to sit when I need a break or just want to enjoy the gorgeous room. I am so very pleased with how it came out!